Showing posts with label Witchy Crafts. Show all posts

Tuesday, June 30, 2015

Tea Witchcraft (That's Not Just Tea)

So, as a witch, my herb collection is severely lacking. I don't have any lavender or bay leaves, really I just have a few kitchen spices and that's it.

I do, however, have an rather large amount of loose leaf teas (mostly herbal).

Really, just a lot of tea.

So I often charge and drink tea as part of my practice. However, I think that tea witchcraft can be used for things other than straight up tea. So here are two things that I did in the past week that involve tea. Hopefully, they will help you form some ideas of your own.

Tea Craft #1: Vanilla Chai Cake

A while ago, my mother told me that I could use teas in baking (or cooking, in theory) by replacing whatever water the recipe called for with tea instead. I tried it out this week because I had company coming over, and decided to make a cake with the intention that people be sweet to each other.

I followed the cake recipe found here: http://allrecipes.com/recipe/simple-white-cake/

The recipe calls for milk instead of water, so I decided to use chai since I read that chai is easier to prepare in milk compared to other teas. In addition, chai is delicious and sweet, so I thought that it would definitely add to my intent.


I used a 1/2 cup of  milk like the recipe called for, and added a large teaspoon of the chai I was using. I brought it to a low boil, and simmered it for ten minutes. You have to stir it every so often to prevent a skin from forming on top of the milk.

After the ten minutes, I poured it back into the measuring cup.


Here you can see the color it ended up after steeping, as well as the name of the chai itself. I found that after simmering, a bit of the milk had evaporated, so I added a touch more milk to bring it back up to half a cup.

After I had mixed the rest of the ingredients that the cake called for, I added the chai to the recipe. You can strain the tea leaves out of it, but I decided to leave them in to make the cake a little stronger with the chai flavor.


I stirred it all together, then baked it. After it baked and cooled off a bit, I frosted it with chocolate icing (again, focusing on the sweetness) and topped it with rainbow sprinkles. As I frosted and sprinkle-ed it, I repeated my intent over it several times.

I was so excited to eat it, I forgot to take a picture of it all done! But here's a picture it with some slices out of it.


It ended up being probably the most delicious cake I'd ever eaten, and I will absolutely be making it for lots of events in the future.

Tea Craft #2: Self- Love Bath Salts

My new apartment has a bath tub in it, so I am planning on taking Full Moon bath rituals. This month I wanted to focus on self-love because, a) I think that is something that people can always use, and b) I've been feeling kind of down since the move.

I love this craft because its so easy, and chances are you already have everything you need to make it: some sea or Epsom salt, a jar to keep the finished product, and some loose leaf tea.

I used two different types of herbal teas, and Epsom salt. I would have preferred sea salt, but I had Epsom salt on hand already, so that's what I used. I used a mason jar to store it, again because its what I had.


The teas I used are called Namaste and Really Raspberry. Namaste has small rose buds and chamomile, which are good for self-love and relaxation. Really Raspberry has (you guessed it) raspberry, which is another good loving kind of fruit (in addition to being my favorite), as well as hibiscus.

I also chose these teas because I know they will make a very pretty pink bath.

First. I added the Epsom salt to the jar, a little less than half way. Then I alternated scoops of the two teas on top.


I added the tea so that the total jar contents were about two thirds of the way full.


Finally, I shook it all up to mix the salt and the tea. As I shook I focused on my intent of giving me self- love.


It looks much prettier in person, and hopefully with make a lovely bath.

Both of these crafts were super easy, and I hope it helps you come up with some crafty ideas of your own, whether or not they involve teas.

Thanks for reading!

Tuesday, April 7, 2015

DIY Negativity Banishing Doll


I've been talking about this doll for a few weeks, and I was finally able to finish it. I wanted to wait until the waning moon, to get some of the banishing energy from it.

I forgot to take pictures of the early part of the process, so I will explain to the best of my abilities.

Materials:
Fabric (I used black felt, or something like that. It's really soft.)
Two buttons
Ribbon
Thread
Needle
Doll Stuffing
Three tealight candles

Sachet:
Fabric
Thread
Black candle/wax
Black Pepper
Salt
Cloves
Basil

Instructions:

First, I traced a doll pattern on the fabric, and cut two pieces of it. I positioned the two buttons on the doll for eyes, and stitched them onto the right side of one of the pieces.

Then I put it right sides together, and stitched it most of the way around, leaving an opening for the stuffing. This meant that I stitched around the body, and left the head open. Once that was sewn, I flipped it inside out, so that now the right sides were facing out.

After that, I made the sachet to put inside of it. I took a small bit of scrap fabric I had, and placed a bit of the salt, pepper, cloves, and basil in the fabric. I chose these herbs because I have read about their properties in repelling/ preventing negativity. Then I pulled the fabric up and wrapped thread around it to keep it shut. I burned a black crayon for the wax over the thread to secure the thread didn't come undone.

Once that was done, I waiting for the waning moon to come into cycle, then I went to my circle. I took my three tealight candles and called upon the God, Goddess, and my own Spirit to help me with my work.

I took the doll, and filled it with stuffing and the sachet:

The dark blue thing in the middle is the sachet

Now stuffed, I stitched the rest of the doll shut:


Then I cut a length of ribbon, and wrapped it around his neck. I tied it in a bow, and then cut to where I wanted it. I put a small stitch on the back, to make sure the ribbon stayed secure.


I made sure the ribbons were even in the front. Then I untied the ribbon, and on the inside of the back of the ribbon, I wrote "Banish Negativity" to sort of cement my intent.


I wrote his name on the other side of the ribbon. Then I re-tied the bow, kissed it, and thanked it for fighting off negativity from me.

I had a lot of fun doing this, and may make some for my friends. I hope you liked this too. 

Here he is, watching over my room.


What a cutie!

Saturday, March 28, 2015

Altar Terrarium

So a while ago, there was a post floating around on Pinterest with an idea for creating an altar out of four glasses, with each one representing the elements. You can find that pin here:

https://www.pinterest.com/pin/325736985520228599/

As you have seen from past altar posts, I have adopted a similar idea by using four jars  and having each one contain something that reminds me of that element. I use ash/chili powder for fire, feathers for air, water for water, and a small terrarium my little sister made me for earth.

Well after almost a year, I have officially pronounced the terrarium dead. Here's what the old one looked like:


 Pretty Dead

So I figured it was time to remake my altar terrarium. When my sister made the old one, she put this little nut she found in it, and I decided to keep it to help tie the old one to the new one. I also kept it because it looks really cool, kind of like a heart or a skull.


After pulling that out of the old terrarium, I went down to the arboretum at school (which is lately where I've been spending all of my time). I thanked the earth for what it had given me, and then I emptied out the jar. This is how the jar looks when its empty:


After emptying the jar, I put down a layer of gravel so that there is a drainage space in the jar:


 I tried to mix up the size of the rocks used so the rocks on top are a bit larger than the ones on the bottom of the layer. After that had been done, I went to a spot I was sitting at the other day, because I knew there was moss there that I could use.


I thanked the earth again, and took a small bit of moss, and carefully arranged it in the jar. Its easier to do it in small bits, instead of trying to fit a whole piece down in the jar.


 Then I came home and carefully wiped the dirt from the inside of the jar so I could see inside of it easier. After that, I positioned the nut from the previous terrarium, as well as a piece of clear quartz.


That's it! I hope it will be happy on my altar. In addition to this terrarium, my friend made me a cactus terrarium as a gift the other day, and I love it! Here's a picture of the one she made, but it doesn't do justice to how it looks in real life:


 She recently opened up a shop on Etsy to sell her handmade witch-y items, such as wire-wrapped crystal pendants. If you'd like to check out her shop, it can be found here:

https://www.etsy.com/shop/CostumeWitcheries?ref=shop_sugg

Have a great day!

Wednesday, March 25, 2015

Witch Kit for a Friend

As I have mentioned before, a few of my friends have expressed their interest in how I practice witchcraft. One of my friends has decided that they want to practice themselves. I am extremely excited to have another person to work with, because while acting as a solitary can be good, I really enjoy practicing with others. I'm not sure how to explain it, but working with others makes my craft feel more complete in a way. So it's kind of annoying that I'm graduating soon, and will be leaving this group.

Anyways, since they are pretty new to it, I wanted to give them a little 'witch kit' to help them get started.


I picked them up two crystals: a clear quartz and an Apache's tear. I chose clear quartz because its a good all-purpose stone, and you can use it for pretty much whatever he would be starting out with. I got the Apache's tear because it will help him stay grounded and also repel negativity, which I think is important.


A few days later, I went to Goodwill and found a set of three bells, which I think are made of brass. I picked the one that sounded the clearest, and got that for him. His living situation means he can't burn any kind of incense, and I use sound to cleanse things myself. I am hoping the bell will be a good alternative to smoke cleansing for him.


I am giving him five white tealight candles because 1) I have a lot of them, and 2) they are like clear quartz in that they can be used for just about whatever he would need candles for.


He has mentioned a type of witchcraft that involves fabric (possibly stitching) so I am giving him some scrap fabric I have so he can explore that option.

Finally, I wrote him a note explaining all of the items, and put them in a jar, which would also be use-able for his craft. I am giving it to him tonight, and I hope this helps him on his path.

This is what the final product looks like:


I am pretty pleased with it, and I hope this helps others plan a little kit for themselves or others!

Monday, March 23, 2015

My "Box of Shadows"


Over my Spring Break, I visited my grandparents. I love visiting their house because I spent much of my childhood playing in the woods they have, and making crafts with my grandmother. Now though, visiting is bittersweet.

My great-grandmother passed away a little over a year ago, and the house serves as a reminder of her passing, and all of the great things she did when she was alive. While I was there, my grandmother gave me the jewelry box that my great-grandfather gave to my great-grandmother.

The box is gorgeous, and I feel very blessed to have received such a special gift.

Here's a better picture of the top

I was originally going to use it as a jewelry box, but I don't have a lot of jewelry, just a few pieces with special significance to me. I do however, have a lot of little bits and pieces I use in my witchcraft. 

I was storing all of it in a small cardboard box, and it was difficult to get things out of it, and it was nearly impossible to organize. It made my dresser top look messy and disheveled, between the cardboard box and all of the little things that wouldn't quite fit in the box.

So I realized it would probably be better if I stored this stuff in the jewelry box. I am calling it my 'box of shadows' because I have a book of shadows, and now I have a box to go with it.


It has three 'sections.' On the top level, there is a long skinny section, in which I am keeping a stone necklace, and some little things my grandmother has made.

Then there are the three little compartments. The one on the left is where I am storing my crystals, center has my incense burner and some pennies, because I have been using them in my craft lately. The right has a small hand mirror, which again was a gift from my great- grandfather. I don't know what I will do with it yet, but mirrors seem to come up a lot, and it was too special for me to get rid of.

The bottom section is where I put everything else. It has some candles, altar cloths, offering bowls, ceramic snowflake, and incense.

I really love it, and I plan on doing a ritual later to thank my great-grandmother and honor her.

How do you store your witchy stuff? Do you have a specific place for all of your things, or are they scattered around the house?

Wednesday, March 11, 2015

Creating a Sacred Space

I woke up this morning having absolutely nothing to write about. I finally settled on venturing back into the arboretum to play my ukulele and leave some offerings, and write about that.

So I grabbed my uke, some bird seed, and a blanket and walked down to the arboretum. I found the circle I was considering using, but with all of the melted snow, it was a muddy mess.

I walked up the hill to a reflective area set up in the arboretum, and as I began to setup my stuff, I received a text from my witch friend (I'll call her L, because I feel like there are a lot of people I talk about, and it can be hard to distinguish,) asking if I wanted to go for a walk in the arboretum. This was extremely coincidental, seeing as I was already there and I told her that of course she could join me.

A few minutes later L arrived, and we talked for a bit, until we discussed the circle she showed me earlier that week.

Remember this one?

Anyways, L's friend had made a circle near this one to combat any negative energy. I asked if I could possibly use this space for Esbat/Sabbat rituals, but I told her I felt weird using it, since it wasn't a space I had created. 

L mentioned her desire to create her own sacred circle in the arboretum, and I told her that we should make one while we were already there!

We wandered a little off the path and found a natural circle of trees which we decided to use. We moved some dead logs to better define the outline of the circle, and pushed all of the dead leaves out of the circle and onto the perimeter. I set a stone in the center to place candles on.

Here is a picture of it- but it doesn't do it justice

Some plants we found growing beneath the dead leaves

Once we set up the physical space, we left to grab some of our rituals tools, such as incense and candles.

We returned with three of our friends as the sun was setting and we performed the ritual right as it grew dark.

L created the ritual, and so I don't feel comfortable posting it here as it is not strictly mine to share. But I can say that it was beautiful, and everyone agreed that it felt very safe in the circle.

I will return tomorrow to work on my craft, and to better define the outline as well as help my friend with his first bit of spell work.

I am very pleased with my sacred space, and I am excited to begin using it!


Wednesday, March 4, 2015

Witchery to Help Study

I am terrible about studying. I really don't study, but somehow I always get really good grades.On top of my lack of studying, I have really terrible senioritis. I don't usually worry about it, until I have an exam, and then there's this mad dash to try and absorb as much information as possible for the test. Yesterday was no exception: I had my first human resources exam.

I needed to study, and to help me stay focused I decided to come up with something quick I could perform before studying. This is what I did:

Materials:
Tea (Or beverage of choice, I used Holy Temple Chai)
Green fluorite
Red jasper

You can substitute whatever stones you feel would work best for you, I chose green fluorite because its good for helping students, and red jasper because it helps me feel focused.

First, I made my tea:


Then I sat in front of my altar, and placed my tea on it. I lit my God/dess candles. I rang my Tibetan singing bowl, and focused on clearing my mind and concentrating on what I needed to do.


After ringing my singing bowl for a bit, I returned it to the altar. I placed some tea in the offering bowl (which you can see between the candles) and I asked for help in focusing on my studies. Then I moved the tea to the center of the altar and held the red jasper and fluorite above it while charging the tea with my intent to focus on studying.

Once I felt like it was sufficiently charged, I took a sip of the tea and said thanks. Then I moved the tea and crystals over to my deck, set a timer for 30 minutes, and studied. Whenever I began to feel flustered about not finding my information, or distracted, I would drink my tea to re-focus.


And that's it! It worked pretty well, usually I can't focus on anything business related for more than five minutes, so going for half an hour was an accomplishment for me.

What do you do to help stay focused?

Wednesday, February 25, 2015

DIY Tarot Deck Bag


So this is the bag I made for my Tarot deck! Since I have kind of started a Tarot group with my friend, my other friend asked me to make one for her deck. I decided to make a tutorial for you guys!

When I was looking for easy diy Tarot bags, I felt like there weren't a lot of resources, and most of them were drawstring, which wasn't what I wanted. So while I was driving one day, I realized I could make them like this. I hand-stitched my own, and used a machine on the one for my friend. I hope this is helpful for people who want to make a cozy home for their decks.

Materials:
1/8 yard of outer material (regular ol' fabric, or heavy duty stuff in case you're worried about it ripping. I used standard cotton, and its held up so far.)
1/4 yard of liner material (I recommend something silky so that the cards slide easier.)
Scissors
Thread
Needle or sewing machine
Ribbon (Something thin)
Pins

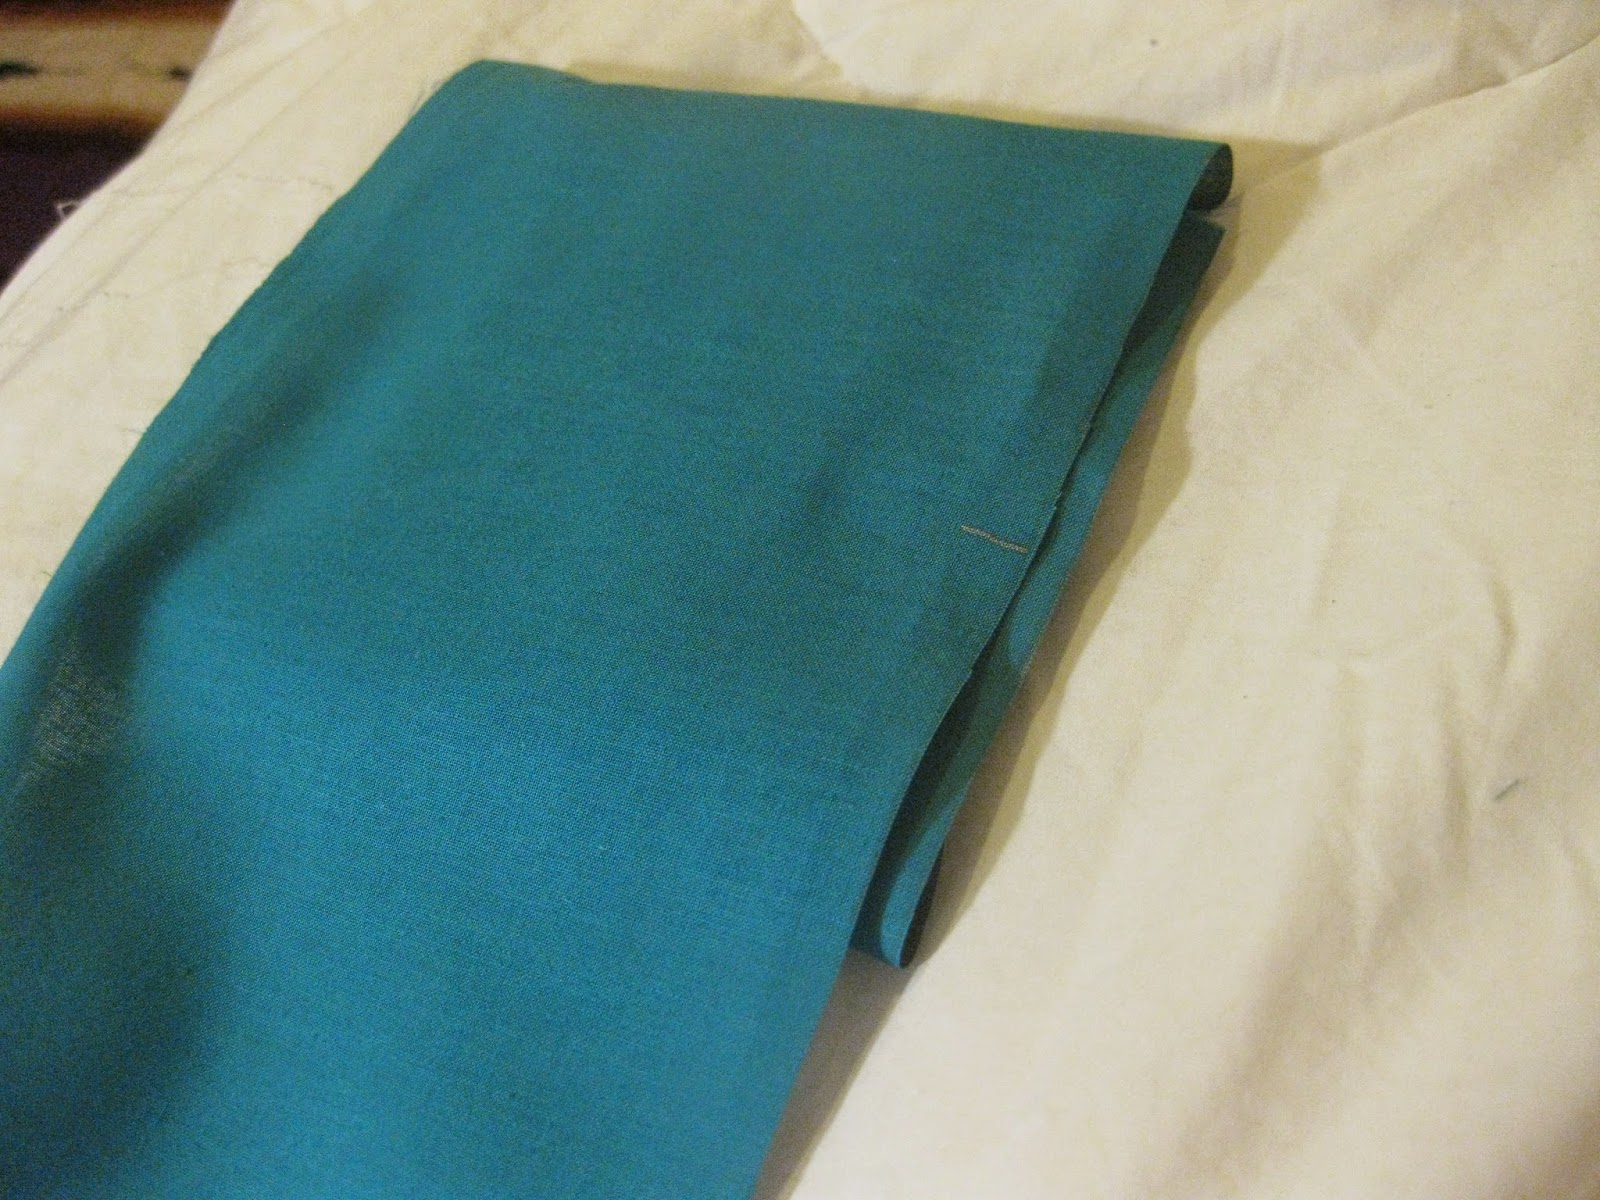
Step One: Find some cute fabric! My friend got hers at Walmart, with the blue material being a dollar, and the liner was two.


Step Two: Place your deck on the outer material, wrong side up. You want to make sure the deck will fit. For this one, I folded the fabric so it covered half of the deck, and then marked it. You might want to fold it over more for a wider bag if you plan on keeping a spread cloth or crystals in the bag.

Like so

Step Three: After marking the spot on the fabric, take a ruler or other straight thing and make a straight line up the fabric so you have a line to follow while cutting. Cut out the fabric.


Step  Four: Once you have a long piece of fabric, you wanna take your deck and lay it on the fabric, kind of near the middle. Fold the bottom of the fabric up, so it covers the deck. Take the top part of the fabric and fold it down over your deck. This part will be the top 'lip' of the bag. Mark the fabric where you want the lip to come down too. I usually have the lip cover the top half of the deck, but you could make it longer if you want.

You can kind of see where I marked it in silver sharpie

Step Five: Cut off the excess fabric, so you just have the fabric for the bag. Then pin the bag fabric to your liner fabric, with the right sides together.


Step Six: Cut the liner to match the bag fabric. Then if you want, cut yourself a cute lil' spread cloth out of the remaining liner material.


Step Seven: Stitch the bag fabric together on the long sides and one short side


Step Eight: Flip the bag inside out, so now the right sides are facing out. Then flatten it with an iron if using a machine, or just manhandle it a little.


Step Nine: Tuck in the raw edges of the open side, and stitch that shut.


Step Ten: Grab your deck again, and place it on the liner side of the bag fabric, and then fold fabric up to cover the deck. Mark it with a pin, remove the deck, and flip it so the liner side is out. Pin the sides together.You should see the bag begin to take shape now.


Step Eleven: Stitch up the sides, liner side out. Flip it inside out so the liner is now inside the bag.


Step Twelve: Cut off a long length of ribbon, and pin it to the lip of the bag. I put mine about 3/4 of an inch up from the bottom of the lip.


Step Thirteen: Stitch a line down the ribbon, and backstitch over it again to make sure it stays attached.


Step Fourteen:Wrap your deck in your spread cloth, and put it in your bag. After that, wrap your ribbons around the back, and tie them in front. Trim off the excess ribbon, after making sure they are even on both sides. The bottom three pictures are to help see how to ribbon will look after its tied and cut.


And that's it! I know it seems like a lot of steps, but it really is simple, and doesn't take long to make them. I've had mine jumbled around in my purse since November, and its held up really good thus far.

I hope you enjoyed this tutorial! Let me know if you have any questions.